How to Treat and Finish Reclaimed Scaffold Boards Indoors
A detailed indoor finishing guide for reclaimed scaffold boards, including cleaning, sanding, sealing, waxing, oiling, staining and choosing the right finish for shelves, furniture and home projects.

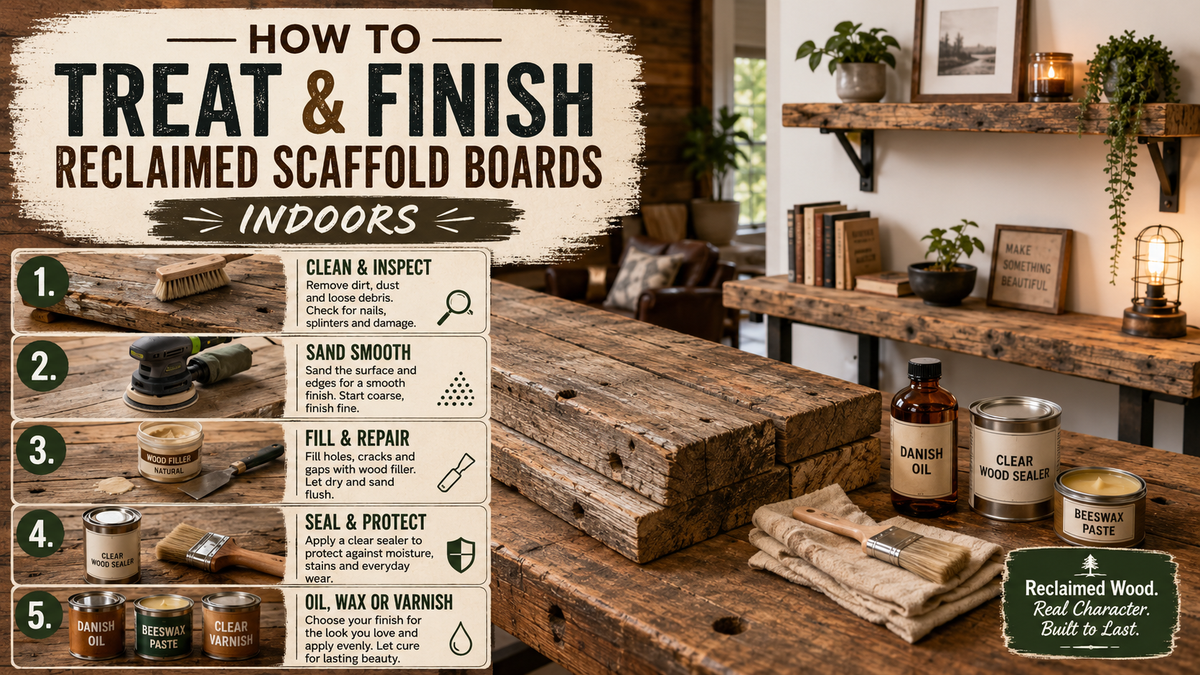


Reclaimed scaffold boards can look incredible indoors when they are prepared properly.
They have the thick, chunky look people want for rustic shelves, alcove shelving, desks, benches, dining tables, coffee tables, worktops, windowsill boards, TV units, shop displays and feature walls. Unlike thin decorative timber, proper scaffold boards have real weight, character and age to them.
However, because they are reclaimed boards, they should not just be cut and placed straight inside the home without preparation.
If you want them to look clean, feel smooth, last longer and suit an indoor space, the right cleaning, sanding and finishing process makes a big difference.
This guide explains how to treat and finish reclaimed scaffold boards indoors, what products you can use, what finish works best for different projects, and what to check before using old scaffold boards inside a house, shop, office, workshop or garden room.
 AA Trading Merchants
Quick Answer: What Is the Best Way to Finish Reclaimed Scaffold Boards Indoors?
The best way to finish reclaimed scaffold boards indoors is to clean them down, remove loose dirt, check for damage, sand the surface smooth, then seal the timber with a suitable indoor wood finish such as wax, oil, varnish, stain, wood dye or a clear protective coat.
For rustic shelves and decorative furniture, many people prefer a light sand followed by wax or oil because it keeps the natural reclaimed look.
For dining tables, desks, kitchen shelving, bathroom shelving or high-use furniture, a stronger protective finish such as varnish, hardwax oil or polyurethane may be better because it helps protect against marks, moisture and daily wear.
The main steps are:
- Choose good reclaimed scaffold boards.
- Clean off dirt, dust and loose material.
- Remove or flatten rough edges and splinters.
- Sand to the level of smoothness you want.
- Apply a suitable indoor treatment.
- Let the boards fully dry or cure.
- Fit them properly using suitable brackets, fixings or supports.
The finish you choose depends on the final use. A shelf does not need the same level of protection as a dining table, bathroom shelf or desk.
AA Trading Merchants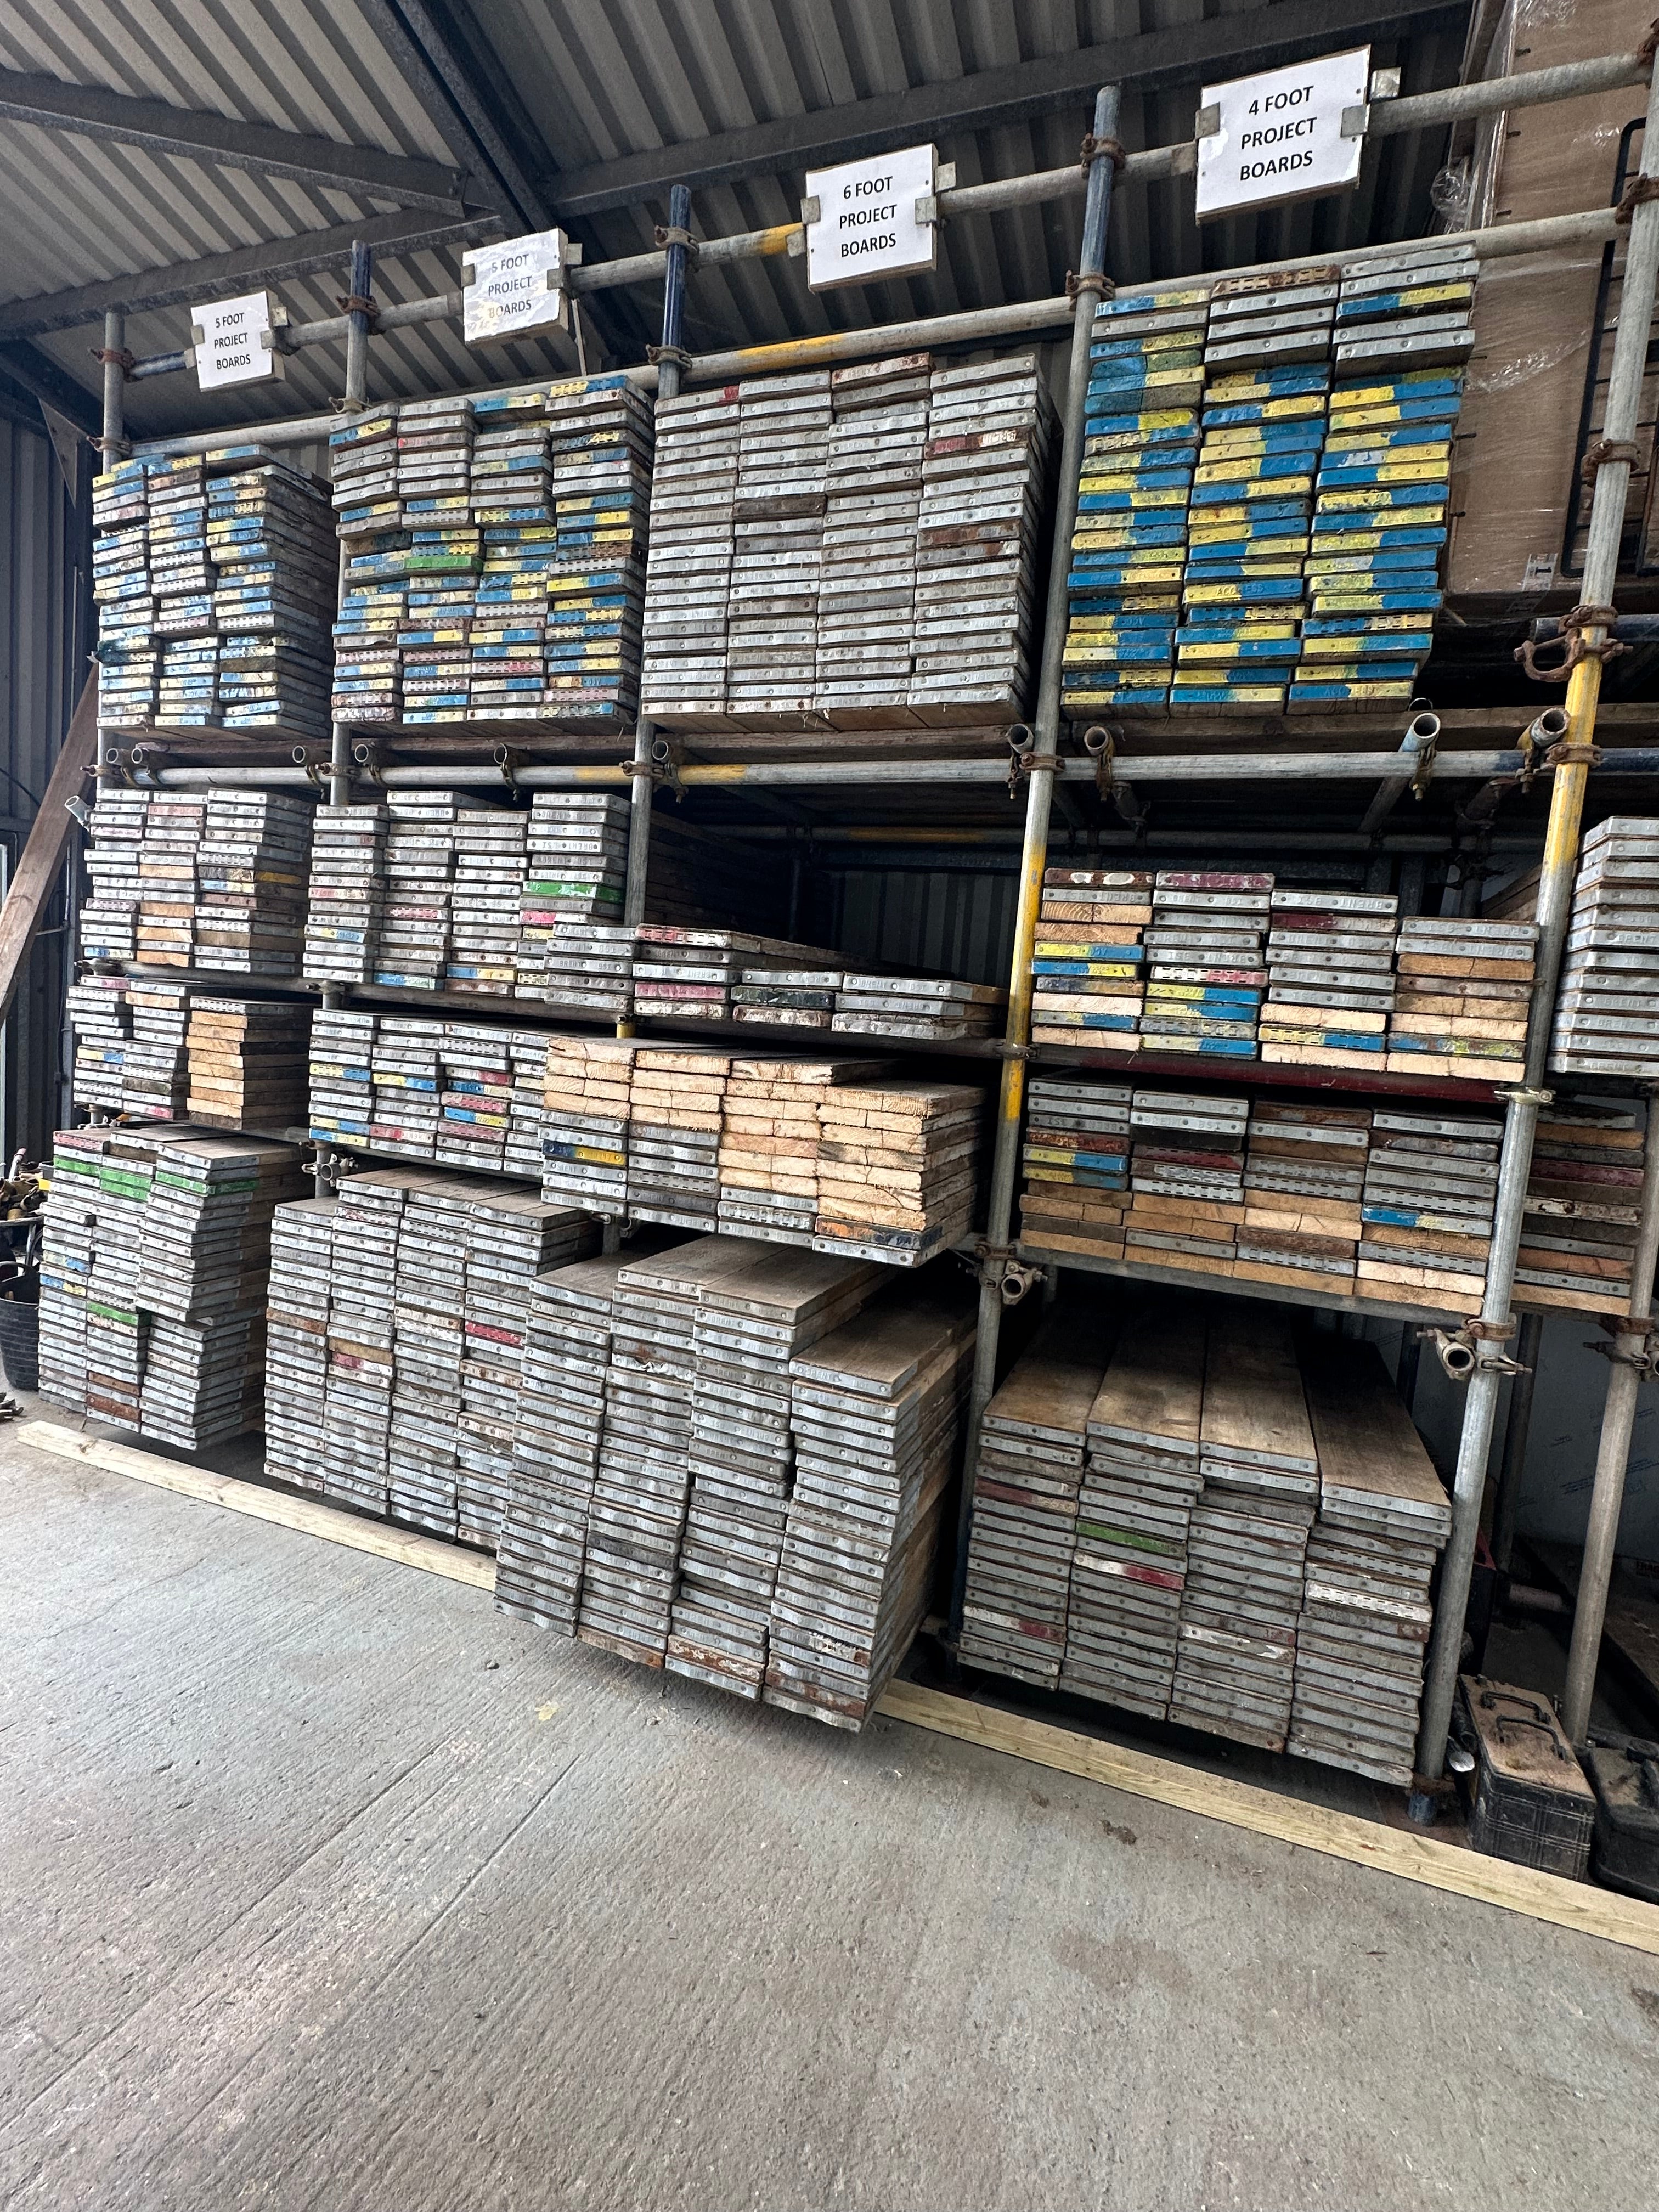
Why Reclaimed Scaffold Boards Are So Popular Indoors
Reclaimed scaffold boards are popular because they do not look like plain, new timber.
They usually have natural marks, grain variation, weathered colour, darker lines, old dents, stamps, scratches, knocks and metal end bands. This is what gives them that rustic, industrial and farmhouse-style look.
People use them indoors for:
- Rustic scaffold board shelves
- Kitchen shelves
- Bathroom shelves
- Alcove shelving
- Floating shelves
- Scaffold board desks
- Dining tables
- Coffee tables
- TV units
- Benches
- Bedroom shelving
- Utility room storage
- Retail displays
- Bar shelving
- Workshop shelving
- Home office furniture
A proper reclaimed scaffold board normally has more character than basic timber bought from a DIY shop. The board has already lived a working life, so every piece looks slightly different.
That is a big part of the appeal.
If you are building shelves, furniture or indoor storage and want something with a chunky rustic look, reclaimed scaffold boards are one of the most popular choices.

Proper Scaffold Boards vs Scaffold-Style Timber
One important thing to understand is that not everything sold online as a “scaffold board” is actually a proper scaffold board.
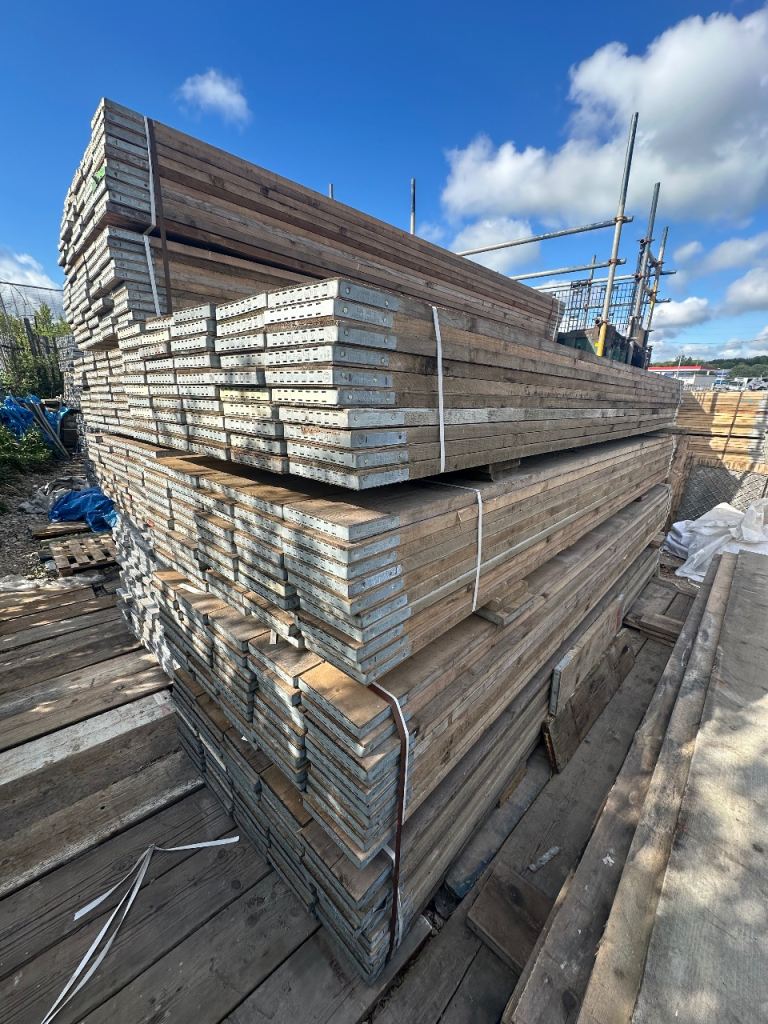
Some timber is made to look like scaffold boards but is not the same thing. These are often called scaffold-style boards, shelf boards or rustic-style boards. They may look similar in photos, but they are usually made for decorative use rather than being genuine used scaffold boards.
Proper reclaimed scaffold boards are generally thicker, heavier and more characterful.
A standard scaffold board is often around:
| Board detail | Common size |
|---|---|
| Width | Approx. 225mm |
| Thickness | Approx. 38mm |
| Full length | Approx. 13ft / 3.9m |
| Common cut lengths | 1ft, 2ft, 3ft, 4ft, 5ft, 6ft, 8ft, 10ft and 13ft |
The approx. 225mm width is one of the reasons scaffold boards work so well for shelving and furniture. They are wide enough for books, plants, kitchen jars, bathroom baskets, ornaments, garage storage and display items.
The approx. 38mm thickness gives them a chunky, solid look that thinner shelf boards often do not have.
For indoor projects, this matters because the finish looks more premium once the boards are sanded, treated and fitted properly.
Do Reclaimed Scaffold Boards Need Treating Indoors?
Yes, reclaimed scaffold boards should usually be treated before being used indoors.
They do not always need heavy treatment, but they should at least be cleaned, sanded and sealed in some way.
This is because reclaimed boards may have:
- Dust
- Dirt
- Rough grain
- Splinters
- Weathered areas
- Old marks
- Moisture staining
- Minor surface cracks
- Rust marks from metal bands
- Old working wear
- Uneven texture
That does not mean the board is bad. In fact, those marks are often what makes reclaimed scaffold boards look so good.
The aim is not always to make the board look new. The aim is to make it safe, clean, smooth enough to use, and protected for the room it is going into.
For example, a rustic shelf may only need a light sand and wax. A table may need a deeper sand and stronger finish. A bathroom shelf may need better moisture protection.

What Finish Should You Use on Indoor Reclaimed Scaffold Boards?
The best finish depends on the look you want and where the board will be used.
Here is a simple comparison:
| Finish type | Best for | Look | Protection level |
|---|---|---|---|
| Clear wax | Rustic shelves, display boards, low-contact furniture | Natural, soft sheen | Light to medium |
| Danish oil | Shelves, desks, furniture, darker natural finish | Warm, richer grain | Medium |
| Hardwax oil | Tables, desks, shelves, worktops | Natural but tougher | Medium to high |
| Clear varnish | High-use furniture, kitchen shelves, tables | Satin, matt or gloss | High |
| Wood stain | Changing the colour before sealing | Darker, warmer or aged | Depends on top coat |
| Wood dye | Colouring the timber while keeping grain visible | Strong colour control | Needs sealing |
| Paint | Modern, black, white or coloured finish | Solid colour | Depends on paint/top coat |
| Matt lacquer | Furniture, commercial displays, shelves | Clean modern finish | High |
For most indoor scaffold board projects, the popular choices are wax, oil, hardwax oil or clear matt varnish.
Step 1: Choose the Right Reclaimed Scaffold Boards First
A good finish starts before you open a tin of wax, oil or varnish.
You need to choose the right boards for the project.
Not every reclaimed scaffold board is ideal for every indoor job. Some boards are better for rustic garden projects, while others are better for shelves, tables and furniture.
For indoor use, look for boards that are:
- Reasonably straight
- Dry enough for indoor work
- Not rotten
- Not badly split through the main structure
- Not overly twisted
- Not full of loose fibres
- Suitable for the finish you want
- The right width and thickness for your project
Some marks, dents and colour differences are normal with reclaimed scaffold boards. In fact, they are usually wanted.
However, if you are making a dining table, desk, kitchen shelf or display unit, you may want straighter, cleaner boards than you would use for a rough garden planter or garage shelf.
For rustic shelves, the boards can have more character.
For indoor furniture, it is usually worth choosing better-looking boards from the start.
Step 2: Let the Boards Dry Before Finishing
If reclaimed scaffold boards have been stored outside or have recently been exposed to damp conditions, they should be allowed to dry before indoor finishing.
This is important because applying oil, wax, varnish or paint to damp timber can cause problems later.
Possible issues include:
- Poor finish adhesion
- Patchy colour
- Cloudy varnish
- Trapped moisture
- Movement after fitting
- Warping or cupping
- Mould risk if timber is too damp
- Finish taking longer to dry
For indoor projects, the boards should be stored somewhere dry and ventilated before finishing.
Do not rush this stage.
If the board is going into a warm house, kitchen, bedroom or living room, it is better to let it adjust and dry properly before sanding and sealing.
A board that feels cold, damp or heavy with moisture should not be finished straight away.
Step 3: Clean the Boards Properly
Before sanding, remove loose dirt and surface dust.
Start with a stiff brush. Brush along the grain and across the corners. Pay attention to the edges, cracks, banded ends and old marks.
You can also use a vacuum to remove dust and loose debris.
For boards with heavier dirt, a slightly damp cloth can help. However, avoid soaking the timber unless you are prepared to let it dry fully afterwards.
A simple cleaning process can be:
- Brush the board down.
- Vacuum loose dust.
- Wipe with a lightly damp cloth.
- Let it dry fully.
- Brush again before sanding.
For indoor furniture, you want the board clean enough that dirt is not being pushed into the grain when sanding.
Step 4: Check for Nails, Staples, Metal and Sharp Bits
Before you sand or cut reclaimed scaffold boards, always check for anything sharp or metallic.
This is especially important if the boards have been used before.
Look for:
- Old nails
- Staples
- Screws
- Sharp splinters
- Raised metal bands
- Loose end bands
- Embedded grit
- Damaged corners
- Deep cracks
- Sharp edges
If you are using power tools, this step matters even more.
A hidden nail or staple can damage tools, create sparks or cause injury. Even if you are only hand-sanding, sharp bits can catch your hands.
For indoor shelves and furniture, any sharp edges should be removed, flattened or sanded smooth.
Step 5: Decide How Rustic You Want the Boards to Look
This is where many people go wrong.
They sand too much.
The beauty of reclaimed scaffold boards is their character. If you fully sand them back until they look like plain timber, you may lose the aged look that made you choose reclaimed boards in the first place.
Before sanding, decide what finish you want.
Light rustic finish
This keeps more of the original character.
Best for:
- Rustic shelves
- Display shelves
- Feature boards
- Garden room interiors
- Shop displays
- Industrial-style rooms
You sand mainly to remove roughness, not to erase every mark.
Smooth furniture finish
This gives a cleaner feel while still keeping some reclaimed character.
Best for:
- Desks
- Coffee tables
- Benches
- TV units
- Bedside shelves
- Indoor storage
You sand more evenly so the surface feels comfortable to touch.
Clean premium finish
This is the smoothest finish.
Best for:
- Dining tables
- Worktops
- Office desks
- Commercial counters
- High-contact furniture
You sand through more stages and use a stronger protective finish.
The right choice depends on the project. A rustic bathroom shelf and a family dining table should not be prepared in exactly the same way.
Step 6: Sanding Reclaimed Scaffold Boards Indoors
Sanding is one of the most important parts of finishing reclaimed scaffold boards.
It controls how the board feels, how the finish looks, and how much character remains.
You can sand by hand, but for larger boards, an electric sander is usually easier.
Common sanding tools include:
- Palm sander
- Orbital sander
- Belt sander
- Sanding block
- Detail sander
- Hand sandpaper
For most indoor scaffold board projects, an orbital sander works well because it smooths the surface without being too aggressive.
What Sandpaper Grit Should You Use?
The grit depends on how rough the board is and how smooth you want it.
A common sanding approach is:
| Stage | Grit | Use |
|---|---|---|
| First sand | 40–60 grit | Heavy roughness, old surface, uneven boards |
| Medium sand | 80 grit | General smoothing |
| Fine sand | 120 grit | Good shelf/furniture finish |
| Extra fine | 180–240 grit | Smooth indoor furniture finish |
For rustic shelves, you may only need 80 grit followed by 120 grit.
For tables and desks, you may want to work up to 180 grit or 240 grit.
Do not always start with very rough grit unless the board needs it. Heavy sanding can remove character quickly.
Should You Sand the Edges?
Yes, the edges should usually be sanded for indoor use.
Scaffold boards can have sharp corners, rough edges and splintered areas.
For shelves and furniture, it is often better to slightly round the edges. This makes the boards feel nicer, safer and more finished.
You do not need to make them look factory-made. Even a small edge softening can make a big difference.
Pay attention to:
- Front edge
- Corners
- Cut ends
- Underside edges
- Around metal bands
- Any area people may touch
If the board will be used as a shelf above a sofa, bed, desk or kitchen area, smooth edges matter.
Should You Keep the Metal End Bands?
This depends on the look you want.
Metal end bands are one of the features that make scaffold boards recognisable. Some people love them because they add an industrial, authentic look.
They can work well on:
- Rustic shelves
- Retail displays
- TV units
- Garden room shelves
- Industrial furniture
- Workshop interiors
However, for some indoor furniture, you may prefer to remove them or cut the board so the bands are not visible.
Before keeping metal bands indoors, check that they are:
- Secure
- Not sticking out
- Not sharp
- Not badly rusted
- Not loose
- Not likely to scratch walls or hands
If you keep them, clean them carefully and make sure they are safe to touch.
Step 7: Remove Dust After Sanding
After sanding, the board will be covered in fine dust.
Do not apply finish straight over sanding dust.
Remove dust properly by:
- Vacuuming the board.
- Brushing the grain.
- Wiping with a clean cloth.
- Using a tack cloth if needed.
- Checking corners and cracks.
Dust left on the board can cause a rough, patchy or cloudy finish.
This is especially important when using varnish, lacquer or paint.
Step 8: Test the Finish First
Before coating the whole board, test the finish on a small area.
This matters because reclaimed scaffold boards can absorb products differently depending on the age, grain, surface marks and previous exposure.
A clear oil may make the board darker than expected. A stain may look stronger on one board than another. A varnish may highlight marks more than you thought.
Always test first if appearance matters.
Good test areas include:
- The underside
- An offcut
- The back edge
- A cut end
- A hidden section
Let the test area dry before deciding.
The wet colour is not always the final colour.
Best Indoor Finish for Scaffold Board Shelves
For scaffold board shelves, the most popular finishes are wax, Danish oil, hardwax oil or clear matt varnish.
Shelves usually do not get the same wear as a table, so you can often choose the finish based on appearance.
Wax finish for shelves
Wax gives a soft, natural look and is good for rustic boards.
It helps the surface feel nicer without making the board look too shiny.
Wax is good for:
- Bedroom shelves
- Living room shelves
- Alcove shelves
- Decorative shelves
- Feature shelving
It is less suitable for wet areas or heavy kitchen use unless maintained properly.
Oil finish for shelves
Oil brings out the grain and deepens the colour.
It can make pale scaffold boards look warmer and richer.
Oil is good for:
- Kitchen shelves
- Utility shelves
- Rustic furniture
- Display boards
- Office shelves
Some oils need more drying time, so always follow the product instructions.
Varnish for shelves
Varnish gives stronger protection.
It is useful if the shelf will be wiped regularly or used in a kitchen, bathroom or commercial space.
A matt or satin varnish is often better than gloss if you want to keep a natural rustic look.
Best Indoor Finish for Scaffold Board Tables
Tables need more protection than shelves.
A dining table, coffee table, desk or worktop will deal with cups, plates, hands, laptops, spills, cleaning and daily wear.
For tables, consider:
- Hardwax oil
- Durable clear varnish
- Polyurethane finish
- Furniture lacquer
- Multiple coats of protective oil
A basic wax finish may look nice, but it may not be strong enough for heavy use unless you are happy to maintain it.
For a table, the finish should protect against:
- Water rings
- Food marks
- Scratches
- Stains
- Heat from cups
- Cleaning
- General wear
A matt or satin finish often works best because it protects the board without making it look overly shiny.
Best Indoor Finish for Scaffold Board Desks
For desks, you want a smooth surface that feels comfortable under your hands.
A rough rustic board may look good, but if you are writing, using a mouse or resting your arms on it, the surface needs more preparation.
For a scaffold board desk, it is usually best to:
- Sand the top well.
- Round the front edge slightly.
- Fill major holes if needed.
- Apply a hardwearing finish.
- Let it fully cure before use.
Good finishes for desks include:
- Hardwax oil
- Clear matt varnish
- Satin varnish
- Danish oil with suitable maintenance
- Furniture lacquer
If you use a computer mouse directly on the desk, a smoother finish is usually better.
Best Finish for Bathroom Scaffold Board Shelves
Bathroom shelves need extra care because bathrooms have moisture, steam and temperature changes.
Reclaimed scaffold boards can still be used in bathrooms, but they need proper sealing.
For bathroom use, avoid leaving the board raw.
Better finish options include:
- Clear varnish
- Hardwax oil
- Moisture-resistant wood finish
- Multiple coats of suitable sealer
- Painted finish with proper primer and top coat
Pay special attention to:
- Cut ends
- Underside
- Back edge near the wall
- Screw holes
- Around brackets
- Any exposed end grain
End grain absorbs moisture more quickly than the face of the board, so seal it properly.
A bathroom shelf above a sink should have stronger protection than a decorative shelf in a bedroom.
Best Finish for Kitchen Scaffold Board Shelves
Kitchen shelves can look brilliant made from reclaimed scaffold boards.
They work well for:
- Jars
- Mugs
- Plants
- Cookbooks
- Plates
- Rustic displays
- Open shelving
- Pantry-style storage
However, kitchens also have steam, grease, cleaning spray and daily handling.
For kitchen shelves, a wipeable finish is useful.
Good choices include:
- Satin varnish
- Matt varnish
- Hardwax oil
- Durable furniture oil
- Sealed stain
If the shelf is near a hob, sink or kettle, protection becomes more important.
Also, be careful using reclaimed timber for direct food preparation surfaces. For chopping, raw food preparation or direct food contact, a suitable food-safe worktop finish may be required.
For normal shelves holding jars, mugs and decorative items, a sealed finish is usually enough.
Should You Use Woodworm Treatment?
Some people ask whether reclaimed scaffold boards need woodworm treatment before indoor use.
The answer depends on the board.
If there are signs of active woodworm, you should not ignore it.
Possible signs include:
- Small round holes
- Fresh-looking dust
- Crumbly areas
- Weak timber
- New dust appearing after cleaning
- Soft patches
Old holes do not always mean active woodworm. Reclaimed timber can have old marks from many causes.
However, if you are unsure, it is sensible to treat the board with a suitable woodworm treatment before using it indoors, or avoid that board for indoor furniture.
For shelves and furniture inside the home, choose boards carefully.
Should You Use Preserver on Indoor Scaffold Boards?
For most dry indoor projects, a heavy outdoor wood preserver is not always needed.
Indoor boards are usually finished with wax, oil, varnish, stain or paint rather than outdoor fence-style treatment.
However, if the boards are going into a damp area such as:
- Utility room
- Bathroom
- Boot room
- Garden room
- Garage conversion
- Workshop
- Unheated outbuilding
Then extra protection may be helpful.
Always choose a product suitable for indoor use. Some exterior treatments have stronger smells, chemicals or drying requirements and may not be ideal for living spaces.
Check the product label before using it indoors.
Can You Leave Reclaimed Scaffold Boards Untreated Indoors?
You can leave them untreated, but it is usually not the best option.
Raw reclaimed boards may:
- Hold dust
- Feel rough
- Mark clothes
- Stain more easily
- Absorb moisture
- Be harder to clean
- Release fine timber dust
- Splinter more easily
- Look unfinished
For a decorative feature in a very rustic space, raw timber may be acceptable.
However, for normal indoor use, especially shelves, tables, desks and furniture, some kind of finish is usually better.
Even a simple clear wax or oil can make the board feel much more suitable for indoor use.
Wax vs Oil vs Varnish: Which Is Best?
This is one of the most common questions when finishing reclaimed scaffold boards.
There is no single best answer because each finish gives a different result.
Wax
Wax gives a traditional, soft, rustic finish.
It is easy to apply and looks natural. It is good for decorative shelves and low-contact furniture.
However, it is not the strongest option for water, heat or heavy wear.
Best for:
- Rustic shelves
- Decorative furniture
- Living rooms
- Bedrooms
- Display boards
Oil
Oil soaks into the timber and brings out the grain.
It usually darkens the board and gives a warmer look. It is good for shelves, desks and furniture.
Some oils offer better protection than others.
Best for:
- Desks
- Shelves
- Benches
- Furniture
- Natural rustic finishes
Varnish
Varnish sits more on the surface and gives stronger protection.
It can be matt, satin or gloss.
For reclaimed scaffold boards, matt or satin is often the best choice because it protects the board without making it look too shiny.
Best for:
- Tables
- Kitchen shelves
- Bathroom shelves
- High-use furniture
- Commercial displays
Hardwax oil
Hardwax oil is a popular middle option.
It keeps a more natural look than some varnishes but gives better protection than basic wax.
Best for:
- Tables
- Desks
- Shelves
- Worktops
- Premium indoor furniture
Clear Finish or Dark Stain?
This depends on the style of your room.
A clear finish keeps the board looking natural. It may still darken the grain slightly, especially if you use oil.
A dark stain can create a more dramatic look.
Dark scaffold board finishes work well with:
- Black metal brackets
- Industrial interiors
- Rustic kitchens
- Dark feature walls
- Bar shelving
- Coffee tables
- Media units
- Shop displays
Lighter clear finishes work well with:
- Farmhouse kitchens
- Neutral rooms
- Scandinavian-style interiors
- Light walls
- Natural wood furniture
- Minimal rustic shelves
If you are unsure, test both on an offcut first.
Once a board is stained dark, it can be difficult to go back to a lighter look.
Popular Indoor Scaffold Board Finish Ideas
Here are some common finish styles people choose for reclaimed scaffold boards.
| Finish style | How it looks | Best for |
|---|---|---|
| Natural rustic | Light sand and clear wax/oil | Shelves, displays, furniture |
| Dark industrial | Dark stain with matt sealer | Bars, desks, TV units, shop displays |
| Smooth farmhouse | Sanded smooth with satin finish | Kitchens, dining rooms, alcoves |
| Weathered grey | Grey wash or weathered stain | Modern rustic interiors |
| Black painted | Solid black or black-wash finish | Modern shelving, feature walls |
| Clear matt sealed | Natural colour with low shine | Tables, shelves, desks |
| Warm oiled | Richer grain and deeper tone | Furniture and worktops |
The best finish is the one that suits the room and the use.
A board for a garage shelf can stay more rugged. A board for a kitchen shelf should look cleaner and be easier to wipe.
Should You Fill Cracks, Holes and Dents?
Not always.
Cracks, dents and old marks are part of the reclaimed look.
For rustic shelves, you may want to keep them visible.
For desks, dining tables and worktops, you may want to fill larger holes or cracks so the surface is easier to use and clean.
You can use:
- Wood filler
- Two-part filler
- Clear resin
- Coloured filler
- Sawdust mixed with glue
- Dark filler for contrast
If you want a rustic industrial look, dark filler can make cracks stand out in a stylish way.
If you want a cleaner furniture look, choose filler closer to the colour of the wood.
Always sand again after filling.
Should You Plane Reclaimed Scaffold Boards?
Planing can help if the board is uneven, but it can also remove a lot of character.
If you plane the board heavily, you may lose the weathered surface and aged marks.
Planing may be useful when:
- Making a table top
- Joining boards together
- Creating a desk
- Fixing uneven edges
- Making furniture that needs a flatter surface
For simple shelves, planing is often not needed.
A good sand may be enough.
If the aim is rustic character, avoid over-machining the board.
Can You Use Reclaimed Scaffold Boards for Floating Shelves?
Yes, reclaimed scaffold boards are very popular for floating shelves.
Their chunky thickness makes them look strong and premium.
However, because they are heavy, they need proper fixing.
For floating shelves, consider:
- Wall type
- Board length
- Board weight
- Items going on the shelf
- Bracket strength
- Fixing quality
- Stud location
- Masonry wall strength
- Depth of the board
A standard scaffold board is approx. 225mm deep, which is a useful shelf depth. However, that also means the shelf can put more pull on the wall fixings compared with a shallow shelf.
For heavy boards, use suitable brackets and fixings for the wall type.
If unsure, ask someone experienced with fitting shelves.
Can You Use Reclaimed Scaffold Boards for Alcove Shelves?
Yes, alcove shelves are one of the best indoor uses for reclaimed scaffold boards.
The chunky board style suits fireplaces, living rooms, bedrooms and dining rooms.
For alcove shelves, boards can be cut to the exact width needed.
Finishing tips for alcove shelves:
- Sand the front edge nicely.
- Seal all visible faces.
- Do not forget the cut ends.
- Choose a finish that matches the room.
- Use strong battens or brackets.
- Check the wall is suitable.
- Fit level and secure.
Alcove shelves often look best with a natural wax, oil or matt varnish because the board keeps its rustic look without feeling dirty or rough.
Can You Use Reclaimed Scaffold Boards for Dining Tables?
Yes, but tables need more preparation than shelves.
A dining table has to feel comfortable, clean and usable every day.
For a scaffold board dining table, you may need to:
- Select straighter boards
- Dry the boards properly
- Sand more thoroughly
- Join boards carefully
- Fill larger gaps if needed
- Seal all sides
- Use a durable finish
- Protect against spills and heat
- Maintain the finish over time
A dining table finish should be stronger than a decorative shelf finish.
Hardwax oil, clear varnish or a tough furniture finish is usually more suitable than simple wax.
Can You Use Reclaimed Scaffold Boards for Indoor Benches?
Yes, scaffold boards are excellent for benches because they are thick and chunky.
They work well for:
- Hallway benches
- Boot room benches
- Dining benches
- Garden room benches
- Retail seating
- Workshop seating
- Rustic storage benches
For benches, make sure the top face and front edge are sanded well.
Nobody wants clothing catching on splinters.
A wax or oil finish can work well for decorative benches, but for high-use seating, a stronger sealed finish may be better.
Can You Paint Reclaimed Scaffold Boards Indoors?
Yes, you can paint reclaimed scaffold boards.
Painting is a good option if you want a cleaner modern look or want the boards to match a room.
Popular paint finishes include:
- Matt black
- Satin black
- White
- Cream
- Charcoal
- Sage green
- Navy
- Rustic wash
- Distressed paint effect
Before painting:
- Clean the board.
- Sand rough areas.
- Remove dust.
- Use a suitable primer if needed.
- Apply thin coats.
- Seal if required.
Painting hides some of the natural reclaimed character, but it can work very well for modern interiors.
A black painted scaffold board shelf with black brackets can look smart and industrial.
Can You Stain Reclaimed Scaffold Boards?
Yes, staining is a popular option.
Wood stain changes the colour while still allowing the grain to show.
Common stain colours include:
- Medium oak
- Dark oak
- Walnut
- Antique pine
- Jacobean oak
- Grey wash
- Teak
- Black stain
Stain alone is usually not enough protection. It often needs sealing afterwards with varnish, oil, wax or another compatible top coat.
Always test stain first because reclaimed boards can take colour unevenly.
That unevenness can look beautiful, but it can also surprise you if you expected a perfect uniform finish.
How Many Coats of Finish Do Scaffold Boards Need?
This depends on the product and the use.
As a rough guide:
| Finish | Typical coats |
|---|---|
| Wax | 1–2 coats |
| Danish oil | 2–3 coats |
| Hardwax oil | Usually 2 coats |
| Varnish | 2–3 coats |
| Wood stain | 1–2 coats plus sealer |
| Paint | Primer plus 2 top coats |
Always follow the instructions on the product you are using.
More coats are not always better. Thick coats can dry badly, feel sticky or look uneven.
Thin, even coats usually give a better finish.
Should You Finish Both Sides of the Board?
For best results, yes.
Many people only finish the top face and front edge because that is what they can see. However, sealing both sides can help reduce uneven moisture movement.
This matters more for:
- Tables
- Desks
- Bathroom shelves
- Kitchen shelves
- Wide shelves
- Long boards
- Furniture
- Boards near heat or moisture
At the very least, seal the visible face, edges and cut ends properly.
For high-quality indoor work, finishing all sides is usually better.
Do Cut Ends Need Sealing?
Yes, cut ends should be sealed.
End grain can absorb moisture more quickly than the face of the board.
If you cut a scaffold board down to size for shelves, furniture or a table, the fresh cut ends should be sanded and finished.
This helps:
- Reduce moisture absorption
- Improve appearance
- Prevent rough edges
- Make the board easier to clean
- Give a complete finished look
Cut ends are especially important in kitchens, bathrooms and utility rooms.
How to Get a Smooth Finish Without Losing the Rustic Look
The trick is to sand for feel, not perfection.
You want the board to feel safe and usable, but you do not need to remove every mark.
A good method is:
- Sand the top surface with medium grit.
- Smooth the front edge.
- Leave some dents and grain marks.
- Hand-sand corners.
- Remove dust.
- Apply a clear matt or satin finish.
This keeps the board rustic but makes it suitable for indoor use.
Over-sanding can make reclaimed boards look too new.
Under-sanding can leave them rough, dusty and uncomfortable.
The best result is usually somewhere in the middle.
How to Keep the Reclaimed Look
If you want the board to keep its aged look, avoid aggressive sanding and avoid thick glossy finishes.
To keep the reclaimed look:
- Use a light to medium sand.
- Keep some marks visible.
- Choose clear wax, oil or matt varnish.
- Avoid high-gloss finishes.
- Do not overfill every dent.
- Keep metal end bands if they suit the design.
- Test finishes before applying them everywhere.
A matt finish usually looks more natural than gloss.
Gloss can make rustic timber look too shiny and less authentic.
How to Make Scaffold Boards Look More Premium Indoors
A reclaimed board can look rough or premium depending on how it is prepared.
Small details make a big difference.
To make scaffold boards look more premium indoors:
- Choose straighter boards.
- Cut cleanly to size.
- Sand the front edge properly.
- Round sharp corners slightly.
- Seal all visible faces.
- Use matching brackets or supports.
- Pick a finish that suits the room.
- Avoid leaving loose splinters.
- Clean dust from cracks before sealing.
- Let the finish dry fully before fitting.
A well-finished scaffold board shelf can look like a custom-made rustic feature, not just a piece of old timber on a wall.
Common Mistakes When Finishing Reclaimed Scaffold Boards Indoors
A lot of problems come from rushing.
Here are the most common mistakes.
1. Not letting the boards dry
If the boards are damp, the finish may not work properly.
2. Sanding too much
Heavy sanding can remove the character people wanted in the first place.
3. Not sanding enough
Leaving splinters and rough edges can make the board unsuitable indoors.
4. Using the wrong finish
A waxed bathroom shelf may not last as well as a properly sealed one.
5. Not sealing cut ends
Cut ends can absorb moisture and look unfinished.
6. Applying thick coats
Thick coats can dry badly and look patchy.
7. Not testing the finish
Stain, oil and varnish can change the colour more than expected.
8. Fitting before the finish has cured
A finish can feel dry but still not be fully hardened.
9. Using weak brackets
Scaffold boards are heavy, so the fixing method matters.
10. Expecting reclaimed boards to look identical
Reclaimed boards naturally vary. That is part of their appeal.
Best Finish by Indoor Project Type
Here is a practical guide.
| Project | Recommended finish | Why |
|---|---|---|
| Living room shelves | Wax, oil or matt varnish | Natural look with light protection |
| Kitchen shelves | Hardwax oil or varnish | Easier to wipe and more durable |
| Bathroom shelves | Moisture-resistant varnish or hardwax oil | Better against steam and damp |
| Desk | Hardwax oil or satin varnish | Smooth and more durable |
| Dining table | Hardwearing varnish or hardwax oil | Better against spills and wear |
| Coffee table | Hardwax oil, varnish or lacquer | Handles daily use better |
| TV unit | Wax, oil or varnish | Depends on desired look |
| Bench | Oil, hardwax oil or varnish | Protects against contact and wear |
| Shop display | Varnish, hardwax oil or lacquer | More durable for commercial use |
| Feature wall | Light sand and clear seal | Keeps rustic appearance |
The more the board will be touched, wiped or exposed to moisture, the stronger the finish should be.
How to Finish Scaffold Boards for Rustic Shelves
For rustic shelves, the goal is usually to keep the board natural but clean.
A simple method is:
- Brush and clean the board.
- Let it dry.
- Sand with 80 grit if rough.
- Sand again with 120 grit.
- Smooth the front edge and corners.
- Remove all dust.
- Apply clear wax, oil or matt varnish.
- Let it dry fully.
- Fit with suitable brackets.
For a more aged look, do not sand every mark away.
For a cleaner shelf, sand through to 180 grit before finishing.
How to Finish Scaffold Boards for Tables and Desks
Tables and desks need more work.
A better process is:
- Choose straight boards.
- Let them dry indoors.
- Cut to size.
- Check for metal.
- Sand with 60 or 80 grit if needed.
- Sand again with 120 grit.
- Sand to 180 or 240 grit for a smoother top.
- Fill large cracks if needed.
- Remove dust fully.
- Apply hardwax oil, varnish or another durable finish.
- Apply the recommended number of coats.
- Let it cure fully before use.
For desks, focus heavily on the top surface and front edge.
For dining tables, choose a finish that can deal with cleaning, cups and food marks.
How to Finish Scaffold Boards for Bathroom Use
Bathroom projects need more sealing.
A good bathroom method is:
- Choose a dry board.
- Sand all faces and edges.
- Seal cut ends carefully.
- Use a moisture-suitable finish.
- Apply multiple thin coats.
- Let each coat dry properly.
- Seal screw holes if needed.
- Avoid leaving raw timber exposed near water.
Bathroom shelves should not be left raw.
Even if the board is not directly touching water, steam and moisture can affect untreated timber over time.
How to Finish Scaffold Boards for Kitchen Use
Kitchen shelves and units should be easy to wipe.
A good kitchen method is:
- Clean thoroughly.
- Sand smooth enough for wiping.
- Remove dust from cracks and grain.
- Apply stain if colour is wanted.
- Seal with a suitable top coat.
- Finish all visible faces and cut ends.
- Let cure before loading with items.
For open kitchen shelving, matt or satin finishes often work best.
They protect the board while keeping the rustic style.
Should Scaffold Boards Be Treated Differently for Children’s Rooms?
Yes, be more careful.
For children’s rooms, playrooms or nurseries, the boards should be very well sanded and sealed.
Avoid rough edges, splinters, sharp metal bands or heavily weathered surfaces that may shed dust.
Choose indoor-safe finishes and allow them to cure fully before fitting.
For children’s spaces, smoother is usually better.
Are Reclaimed Scaffold Boards Safe Indoors?
Reclaimed scaffold boards can be used indoors, but they should be selected and prepared properly.
Because they are reclaimed timber, you should check for:
- Rot
- Damp
- Loose splinters
- Sharp metal
- Contamination
- Strong smells
- Woodworm signs
- Oil marks
- Chemical staining
- Structural damage
For decorative furniture and shelving, choose clean, dry boards that are suitable for the job.
If a board smells strongly of chemicals, has unknown staining, is rotten or feels unsafe, do not use it inside the home.
For normal indoor projects, a good board that has been cleaned, sanded and sealed can make a beautiful rustic feature.
Do You Need to Disinfect Reclaimed Scaffold Boards?
For normal indoor use, cleaning and sanding are usually the main steps.
Some people like to wipe boards with a suitable cleaner before finishing, especially if the boards are being used in kitchens, bathrooms or children’s rooms.
However, avoid soaking the board.
If you use any cleaning liquid, let the timber dry fully before sanding and sealing.
Do not trap moisture inside the board with varnish, oil or paint.
How Long Should the Finish Dry Before Use?
This depends on the product.
Some finishes are touch-dry in a few hours but take much longer to fully cure.
As a general rule:
| Finish | Before careful handling | Before heavy use |
|---|---|---|
| Wax | Several hours | 24 hours or more |
| Oil | 12–24 hours | Several days depending on product |
| Hardwax oil | 24 hours between coats often common | Several days to cure properly |
| Varnish | A few hours between coats | Several days before heavy use |
| Paint | A few hours between coats | Several days before hard wear |
Always follow the product instructions.
For tables, desks and shelves that will hold heavy items, it is better to wait longer than to rush.
How to Maintain Finished Scaffold Boards Indoors
Once your boards are finished and fitted, they still need basic care.
For waxed boards:
- Dust regularly.
- Avoid soaking with water.
- Re-wax when the surface looks dry.
- Use coasters on tables.
- Clean gently.
For oiled boards:
- Wipe spills quickly.
- Re-oil when the timber starts looking dry.
- Avoid harsh cleaners.
- Use mats or coasters on tables.
For varnished boards:
- Wipe with a damp cloth.
- Avoid abrasive cleaners.
- Touch up scratches if needed.
- Recoat if the finish becomes worn.
Reclaimed scaffold boards are durable, but the finish is what protects the surface indoors.
What Tools and Materials Do You Need?
For a basic indoor scaffold board finish, you may need:
- Stiff brush
- Vacuum
- Clean cloths
- Sandpaper
- Sanding block
- Orbital sander
- Dust mask
- Gloves
- Wood filler if needed
- Wood stain if changing colour
- Wax, oil, varnish or paint
- Brush or lint-free cloth
- Suitable brackets or fixings
- Tape measure
- Saw if cutting to size
- Spirit level for fitting shelves
You do not need every tool for every job.
A simple shelf may only need cleaning, sanding, sealing and fitting.
A dining table or desk will need more preparation.
Reclaimed Scaffold Board Finish Examples
Here are a few common indoor finish ideas.
Rustic shelf finish
Light sand, clear wax, black brackets.
Best for living rooms, kitchens, bedrooms and alcoves.
Dark industrial shelf finish
Medium sand, dark oak stain, matt varnish, black steel brackets.
Best for bars, kitchens, offices and shop displays.
Natural desk finish
Smooth sand, hardwax oil, lightly rounded edges.
Best for home offices and workspaces.
Farmhouse table finish
Sanded top, filled cracks where needed, satin varnish or hardwax oil.
Best for dining rooms and kitchens.
Modern black finish
Sanded board, black paint or black stain, matt protective top coat.
Best for modern interiors, media units and feature shelving.
Bathroom shelf finish
Smooth sand, sealed cut ends, moisture-resistant clear finish.
Best for bathrooms, utility rooms and cloakrooms.
Can You Mix Reclaimed Scaffold Boards With Metal Brackets?
Yes, this is one of the most popular indoor styles.
Black metal brackets, pipe brackets and industrial-style supports work very well with scaffold boards.
The combination of chunky timber and dark metal gives a strong rustic-industrial look.
For shelves, always make sure the brackets are strong enough for:
- The board weight
- The shelf depth
- The wall type
- The items being stored
- The length of the shelf
A reclaimed scaffold board is heavier than a thin shelf board, so bracket choice matters.
Can You Use Reclaimed Scaffold Boards Around Fireplaces?
Scaffold boards can look good around fireplace areas, but you need to be careful with heat and regulations.
Do not place timber too close to heat sources unless you know it is safe and suitable.
For fireplace shelves, mantels or surrounds, check:
- Distance from heat
- Type of fire
- Building safety requirements
- Heat output
- Fixing method
- Finish suitability
Timber can scorch, dry out or become unsafe if fitted too close to strong heat.
If unsure, get proper advice before fitting reclaimed timber near a fire, stove or heat source.
Can You Use Scaffold Boards for Indoor Window Sills?
Yes, scaffold boards can be used for chunky rustic window sills or sill covers.
For this use, seal them well because windows can have condensation.
Important areas to seal include:
- Top face
- Front edge
- Cut ends
- Underside
- Back edge near the window
A hardwax oil or varnish is usually better than a basic wax near windows.
Can You Use Reclaimed Scaffold Boards in Shops, Cafes and Salons?
Yes, reclaimed scaffold boards are popular for commercial interiors.
They are often used for:
- Retail shelving
- Product displays
- Coffee shop counters
- Bar shelving
- Salon shelving
- Barber shop interiors
- Rustic signs
- Feature walls
- Display tables
For commercial use, choose a more durable finish because the boards may be touched, cleaned and used more often.
A clear varnish, hardwax oil or lacquer can help protect the timber while keeping the reclaimed look.
How to Choose the Right Board Finish for Your Room Style
The finish should match the room.
Rustic farmhouse room
Use clear wax, warm oil or light oak stain.
Industrial room
Use dark stain, black brackets and matt varnish.
Modern room
Use smooth sanding, black paint, clear matt varnish or cleaner edges.
Country kitchen
Use natural oil, satin varnish or warm oak stain.
Bathroom
Use sealed varnish or hardwax oil with good moisture protection.
Shop or commercial space
Use a durable wipeable finish that still shows the grain.
The board itself gives the character. The finish controls how refined it looks.
Buying Reclaimed Scaffold Boards for Indoor Projects
If you are buying reclaimed scaffold boards for indoor use, it helps to know what to ask for.
Instead of just asking for “some scaffold boards”, be specific.
Mention:
- What you are making
- How many boards you need
- The length you want
- Whether you want rustic or cleaner boards
- Whether they are for indoors
- Whether you want them cut to size
- Whether you want straighter boards
- Whether you want boards suitable for shelves or furniture
This makes it easier to choose the right boards.
For example, boards for garage storage can be rougher. Boards for living room shelves may need to look cleaner. Boards for a dining table need to be selected more carefully.
What to Send for a Scaffold Board Quote
If you are asking for a quote for reclaimed scaffold boards, it helps to send clear details.
You can send:
- The board lengths you need
- The quantity of each length
- Your postcode if delivery is needed
- What the boards are being used for
- Whether it is an indoor or outdoor project
- Whether you need them cut to size
- Whether you want rustic boards or cleaner boards
- Whether you want them suitable for shelves, furniture or garden projects
Example message:
“Hi, I’m looking for reclaimed scaffold boards for indoor shelves. I need 4 boards cut to 120cm long. I’d like them fairly straight and suitable for sanding/finishing indoors. Can you quote for collection or delivery to my postcode please?”
A clear message helps avoid confusion and makes it easier to get the right boards first time.
Local Buyers: Reclaimed Scaffold Boards in Nottingham and Nottinghamshire
For people searching locally, terms like reclaimed scaffold boards Nottingham, scaffold boards Nottingham, used scaffold boards Nottinghamshire and scaffold boards near me are often used when planning a project.
Local buyers usually want to know:
- Are boards available now?
- What lengths are in stock?
- Can they be cut to size?
- Are they proper scaffold boards?
- Are they suitable for shelves or furniture?
- Can they be delivered?
- Can they collect locally?
- What condition are the boards in?
This is why choosing a local supplier can be useful.
You can see the boards, explain the project and get lengths that suit what you are building.
For indoor projects especially, being able to choose boards with the right look and condition can make a big difference.
Reclaimed Scaffold Boards for Shelves: What Length Should You Buy?
The right length depends on the wall, room and use.
Common shelf lengths include:
| Shelf length | Common use |
|---|---|
| 1ft–2ft | Small feature shelves, bathroom shelves, small displays |
| 3ft–4ft | Kitchen shelves, alcove shelves, books, plants |
| 5ft–6ft | Long wall shelves, living room shelves, utility storage |
| 8ft | Large feature shelves, shop displays, garage storage |
| 10ft–13ft | Cutting into multiple shelves or larger furniture projects |
A full 13ft board can be useful if you want multiple shelves cut from one board.
For example, one long board can often be cut into several smaller shelves depending on your measurements.
This can be better value than buying lots of separate small pieces.
Project Value: What Can You Make From One Scaffold Board?
One of the reasons reclaimed scaffold boards are popular is that they can be cut into many useful sizes.
A single long board can become:
- Two long shelves
- Several small shelves
- A bench top
- A desk top section
- A coffee table top
- Bathroom shelves
- Kitchen storage shelves
- Garage shelves
- Display boards
- Window sill covers
- Rustic signs
Because the boards are usually around 225mm wide and 38mm thick, even shorter offcuts can be useful.
Smaller pieces can be used for:
- Plant stands
- Small wall shelves
- Bracket shelves
- Signs
- Rustic blocks
- Small display plinths
- Workshop storage
- Boot room shelves
This is why it is worth planning your cut list before buying.
Example Cut List for Indoor Shelves
If you have one 13ft scaffold board, you could cut it into different shelf combinations.
Approximate ideas:
| Project idea | Possible cuts |
|---|---|
| Small bathroom shelves | Several 1ft–2ft pieces |
| Alcove shelves | 3 or 4 shelves around 3ft each |
| Kitchen shelves | 2 shelves around 5ft–6ft each |
| Mixed home shelves | 2 longer shelves plus smaller offcuts |
| Display shelves | Multiple short sections |
Always measure your exact space before cutting.
Walls are not always square, alcoves can vary, and shelf brackets need proper placement.
Indoor Finish Safety Tips
When finishing reclaimed scaffold boards indoors or for indoor use, remember these safety points:
- Wear a dust mask when sanding.
- Work in a ventilated space.
- Check for metal before cutting or sanding.
- Use products suitable for indoor use.
- Follow the manufacturer’s instructions.
- Let finishes dry and cure properly.
- Dispose of oily rags safely.
- Keep finishes away from children and pets.
- Avoid using questionable boards indoors.
- Use proper fixings for heavy shelves.
Some wood oils can create heat in used rags if they are left scrunched up, so always follow safe disposal instructions on the product label.
Frequently Asked Questions
Do reclaimed scaffold boards need sanding before indoor use?
Yes, they usually need sanding before being used indoors. Sanding removes roughness, loose fibres and splinters. It also helps the finish apply more evenly. The amount of sanding depends on whether you want a rustic or smooth finish.
What is the best finish for scaffold board shelves?
For most indoor scaffold board shelves, wax, Danish oil, hardwax oil or clear matt varnish are popular choices. Wax gives a soft rustic look, oil brings out the grain, and varnish gives stronger protection.
Can I use reclaimed scaffold boards indoors without treating them?
You can, but it is not usually recommended. Untreated boards can feel rough, hold dust, stain more easily and be harder to clean. A simple wax, oil or clear sealer usually makes them much better for indoor use.
Are reclaimed scaffold boards good for indoor shelves?
Yes, reclaimed scaffold boards are excellent for indoor shelves because they are wide, thick, strong-looking and full of character. They are especially popular for rustic shelves, kitchen shelves, alcove shelving and industrial-style interiors.
How thick is a scaffold board?
A standard scaffold board is commonly around 38mm thick. This gives it the chunky look people like for shelves and furniture.
How wide is a scaffold board?
A standard scaffold board is commonly around 225mm wide. This makes it a useful depth for shelves, desks, storage and display projects.
Can I use scaffold boards in a bathroom?
Yes, but they should be properly sealed. Bathrooms have moisture and steam, so raw timber is not ideal. Use a suitable protective finish and seal cut ends carefully.
Can I use scaffold boards in a kitchen?
Yes, scaffold boards work well for kitchen shelves and rustic storage. For kitchen use, choose a finish that is wipeable and more resistant to moisture, grease and daily handling.
What is better for scaffold boards, wax or oil?
Wax is good for a soft rustic finish on decorative shelves. Oil usually gives deeper colour and better penetration. For heavier-use furniture, hardwax oil or varnish may be better.
Can scaffold boards be stained dark?
Yes, scaffold boards can be stained dark. Dark oak, walnut and black finishes are popular for industrial-style shelves and furniture. Always test the stain first because reclaimed boards can absorb colour unevenly.
Should I seal both sides of a scaffold board?
For best results, yes. Sealing both sides can help reduce uneven moisture movement and gives a better overall finish, especially for tables, desks, bathroom shelves and kitchen shelves.
Can I keep the metal bands on scaffold boards indoors?
Yes, if they are secure and safe. Metal end bands add an authentic industrial look. However, make sure they are not loose, sharp or likely to scratch walls or hands.
How do I stop scaffold boards splintering?
Sand the board properly, especially the front edge, cut ends and corners. Then seal it with wax, oil, varnish or another suitable finish. Very rough boards may need more sanding or may be better for outdoor or workshop use.
Can reclaimed scaffold boards be used for dining tables?
Yes, but they need careful preparation. Choose straighter boards, sand them well, fill major gaps if needed and use a durable protective finish suitable for daily use.
Do scaffold boards need woodworm treatment?
Only if there are signs of woodworm or you are unsure about the board. For indoor use, inspect reclaimed boards carefully and avoid boards that look weak, crumbly or actively affected.
Final Thoughts: Reclaimed Scaffold Boards Can Look Brilliant Indoors When Finished Properly
Reclaimed scaffold boards are one of the best choices for rustic indoor projects because they are chunky, full of character and highly versatile.
They can be used for shelves, tables, benches, desks, storage, displays and feature pieces. The key is choosing the right boards and finishing them properly for the room they are going into.
For simple rustic shelves, a clean, sand and wax may be enough.
For desks, tables, kitchens and bathrooms, it is worth using a stronger protective finish.
The best results usually come from keeping the character while making the board clean, smooth, sealed and suitable for indoor use.
If you want a natural rustic look, do not over-sand. If you want a premium furniture finish, spend more time preparing the surface. If the board will be near moisture or heavy use, choose a finish that gives better protection.
Properly treated reclaimed scaffold boards can turn old working timber into standout indoor shelves, furniture and home features that look unique, practical and full of character.